.svg)
.svg)


Introduction
I would like to explain the authorization system in WhaTap, which is a common question from clients who use WhaTap. I will give you a conceptual overview of the hierarchy and authorizations in WhaTap, but I will explain it with examples of the most common authorization changes that customers ask about.
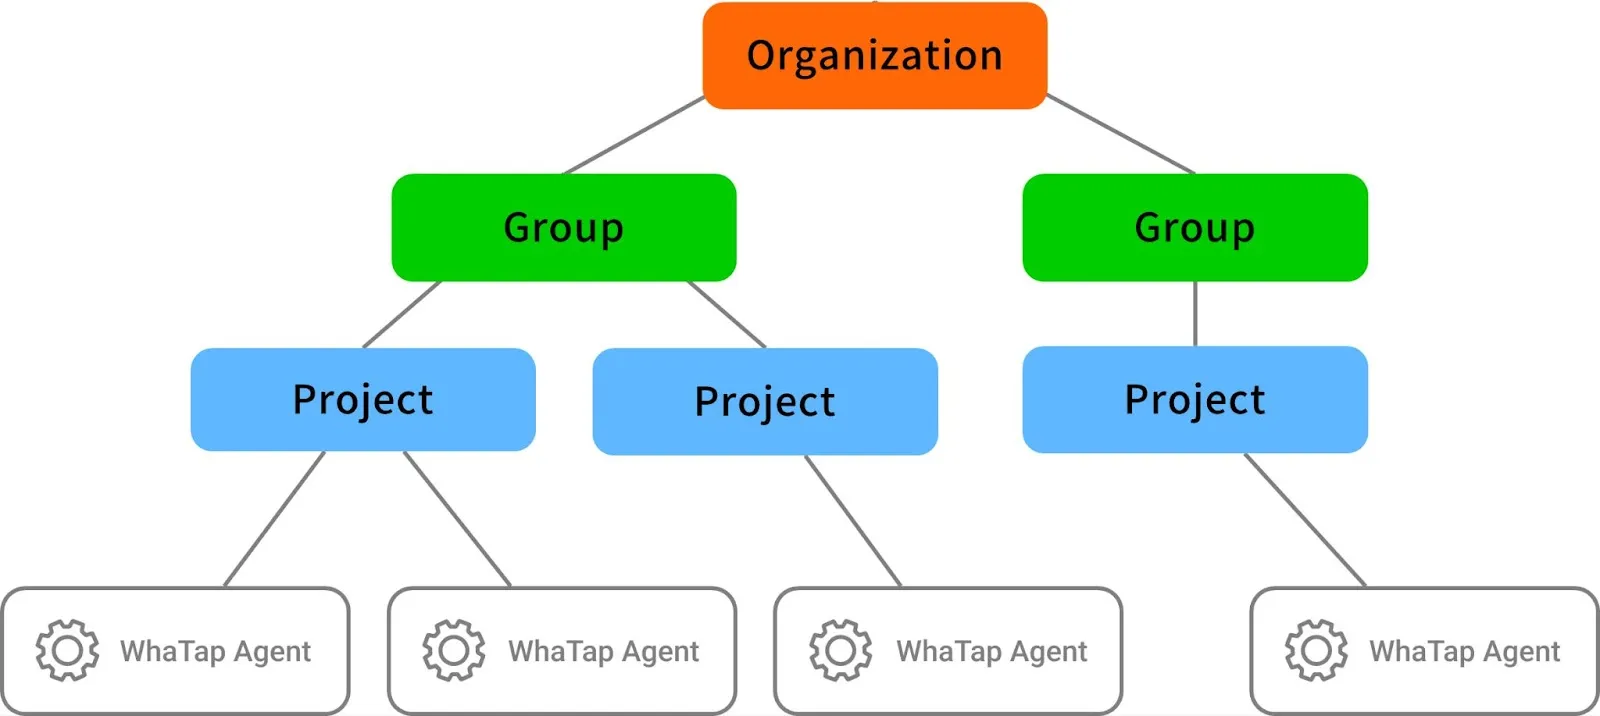
WhaTap's hierarchy
WhaTap organizes its services into logical units called projects. A project is the smallest unit for monitoring and serves as a link between monitored objects and users. You manage hierarchies in a "Project-Group-Organization" tree structure with projects as the basic unit.
Authorizations in WhaTap
WhaTap is designed to grant authorization on a role-based basis, divided into the six authorizations below, which can be granted or restricted on a per-account basis. The first account to create a project will have all six authorizations. Later, you can invite and add members, and you can grant them different authorizations based on their role.
- View & Analyze: Authorization to view project views and performance analytics.
- Edit: Authorization to add, change, and delete projects, groups, and organizations
- Manage users: Authorization to edit member authorizations, add, and delete members
- Receive notifications: Authorization to receive notifications (decide whether or not to receive notifications)
- Notification settings: Authorization to set up notification receipt settings
- Payments: Authorization to see who you pay bills to, manage your payment information, service charge history, payment history, etc.
Changing authorization
When might you need to change authorizations? Here are three common examples.
- Your contact person has changed due to retirement, department transfer, etc.
- Your account is managed by an MSP and the MSP has changed.
- Different people are responsible for monitoring and accounting
The reasons for changing account authorizations can vary, but the process is actually the same for everyone.
Simply add a new contact to a project or group and grant the new contact the appropriate authorizations.
The new person will be able to use WhaTap services with the authorizations they have been granted. You can delete users who have left the company and enter their payment information if they have authorization to pay.
Let's take a look at an example where you need to change account authorization due to the departure of your first contact, which is the most common case we see.
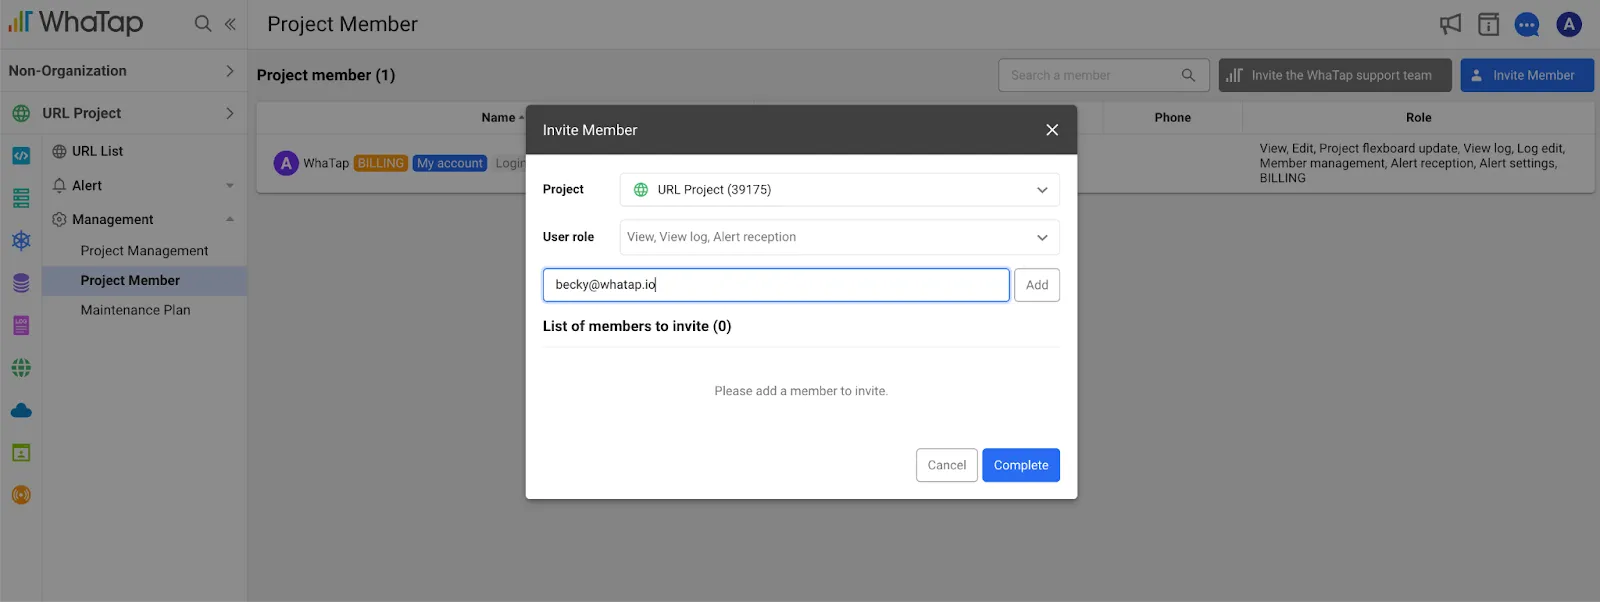
Let's say you have created a Landing project with the account emoh@whatap.io to monitor URLs, but you are leaving the company and want to hand over authorizations to a new person, becky.
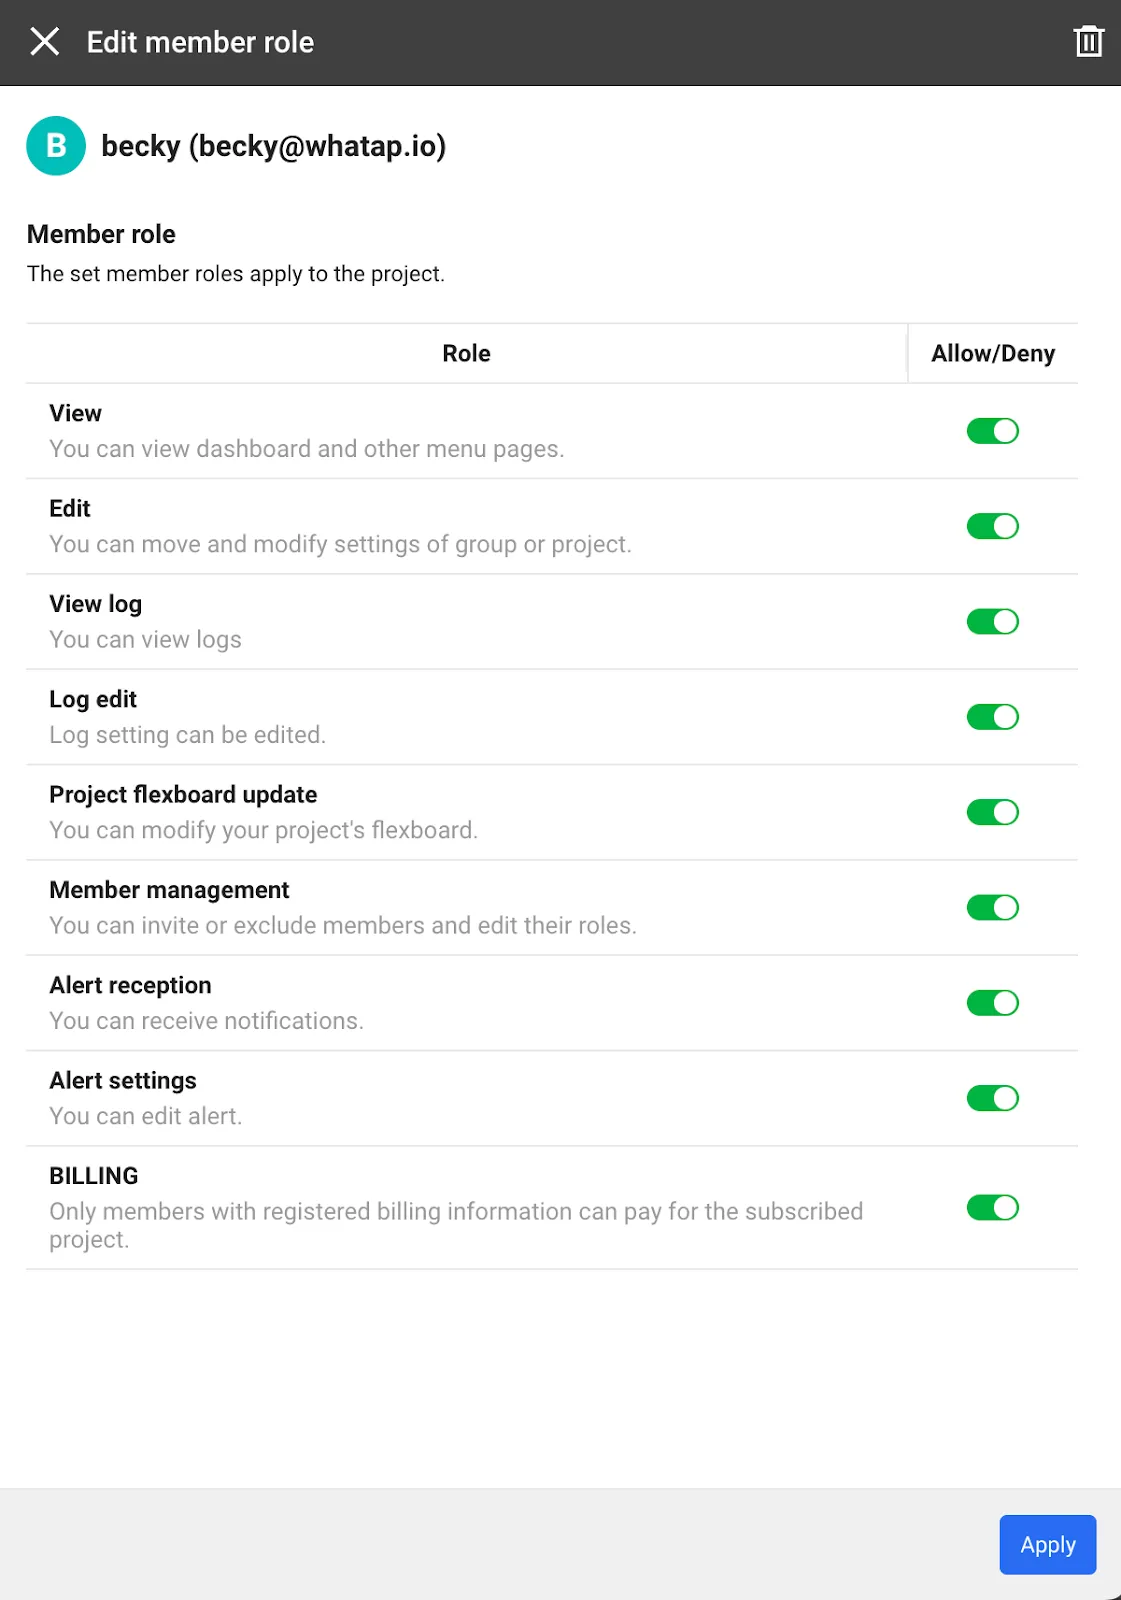
First, add the account becky@whatap.io as a member in that project. Add an email and open the User Authorization drop-down menu to set the authorizations you want to give becky.
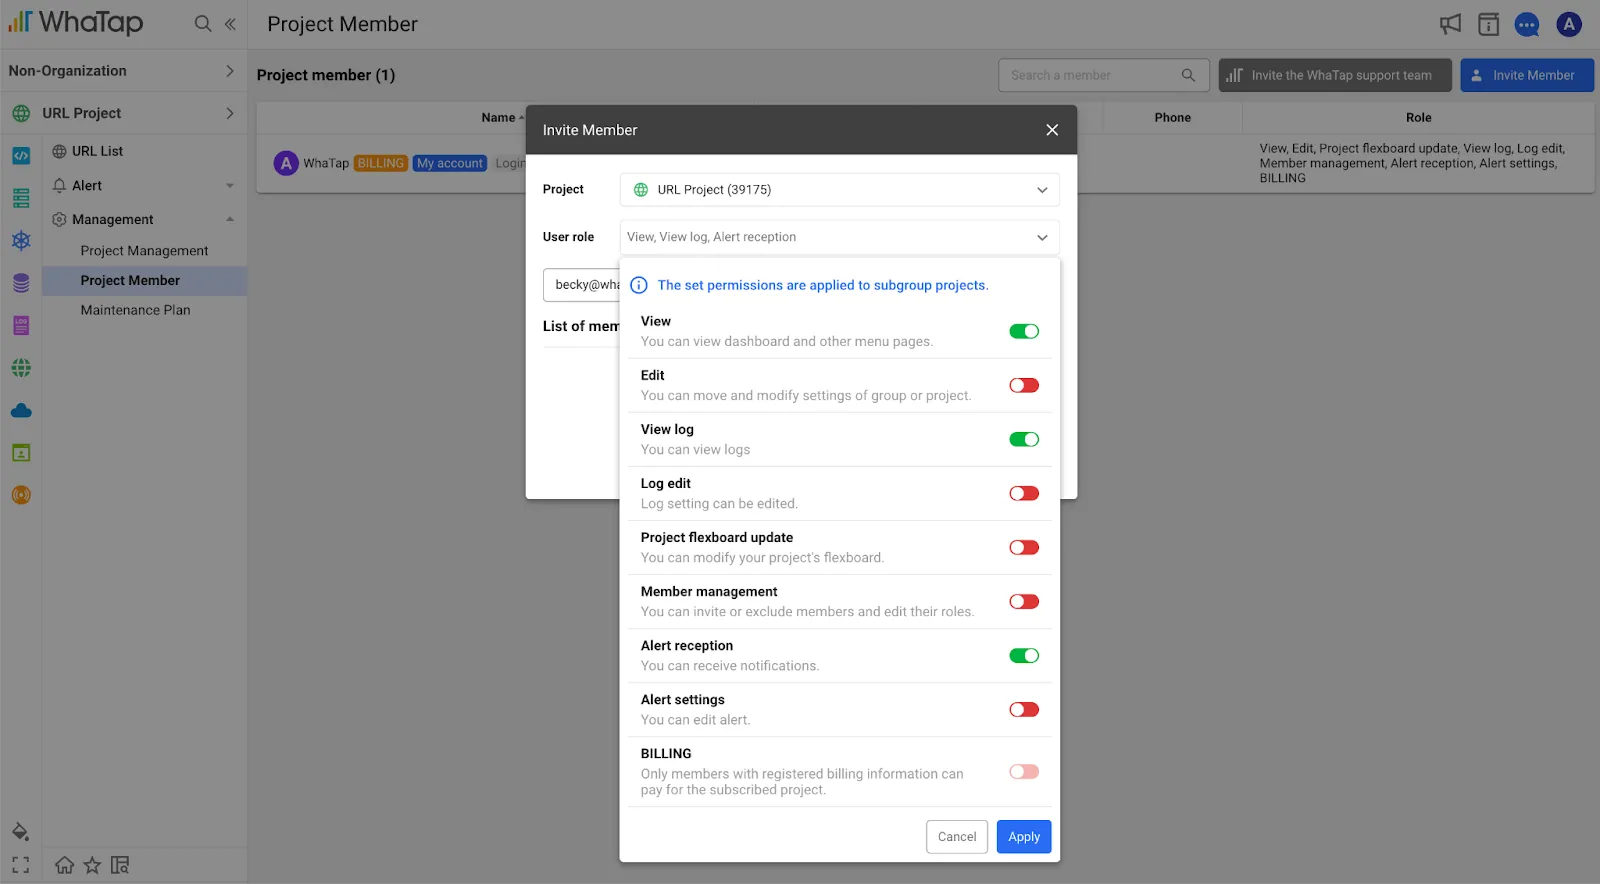
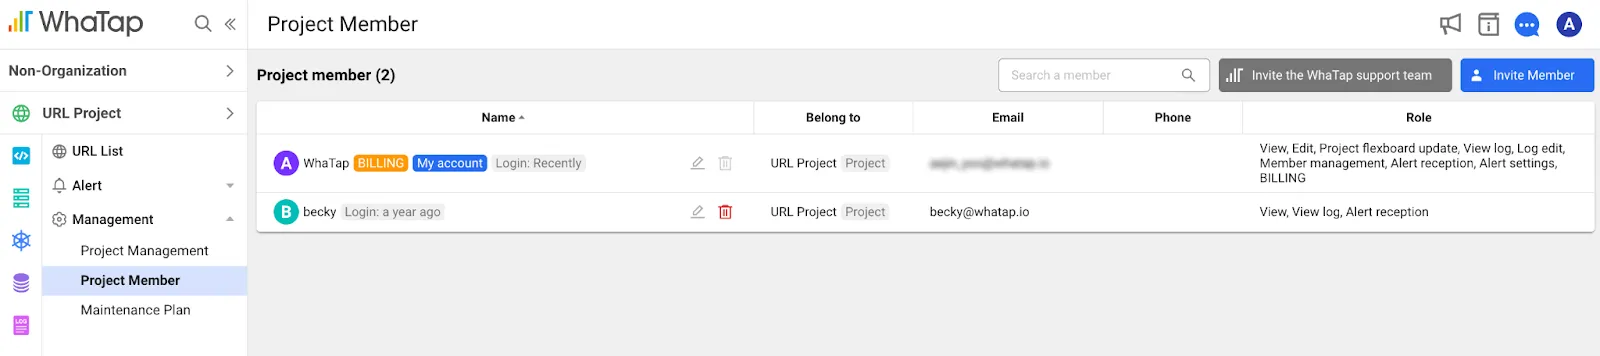
You can see that Becky has been added to the project members. You can grant her full authorizations, including payments, and hit the Apply button.
The important thing here is the "Payment" authorization! Becky, the new contact, needs to register her payment information in order to be billed, which can be done by selecting either "Invoice" or "Card payment" in [Usage history] ⇒ [Payment history].
If you have 99 projects that need to be changed, it would be a bit annoying to have to change authorizations 99 times, wouldn't it? To reduce the hassle of handoffs, you can use groups in the WhaTap Hierarchy structure that we briefly described above to better organize your monitoring.
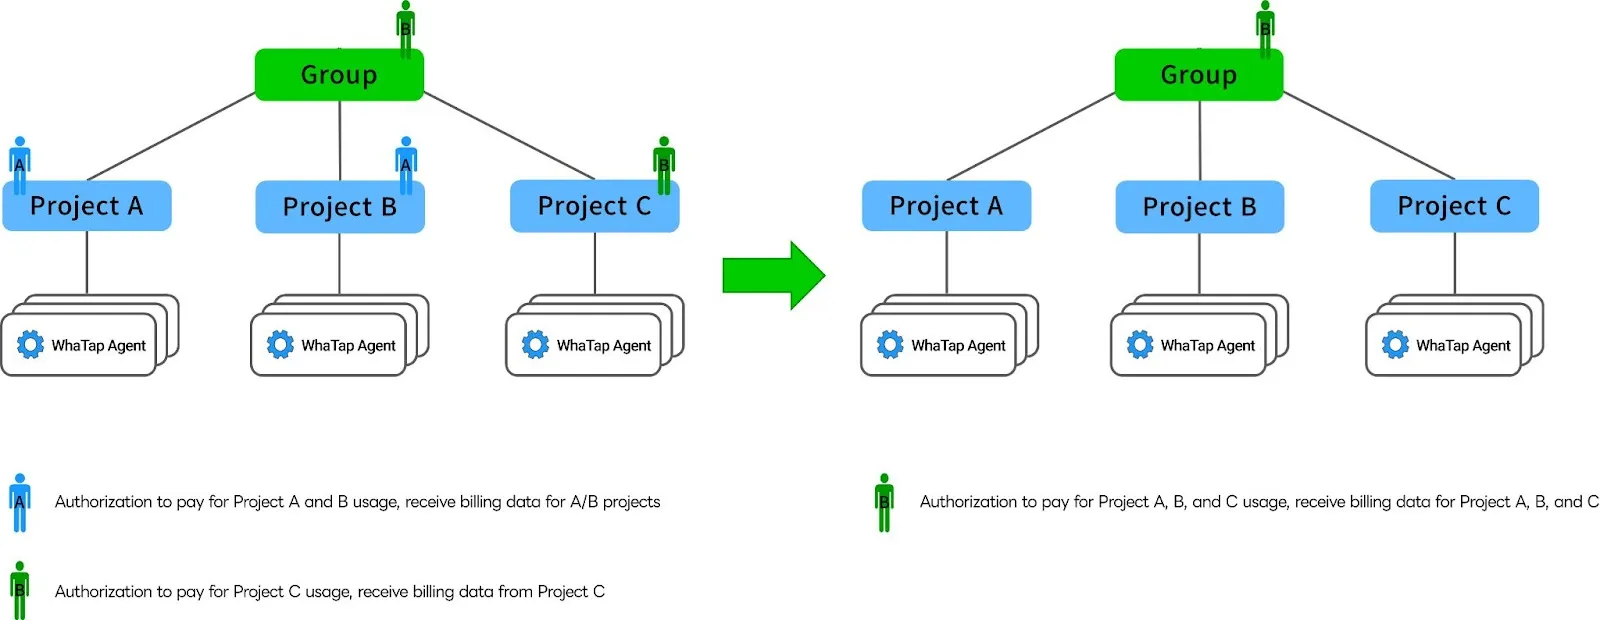
The image below is an example of when projects and groups each have billing authorizations. The structure on the left prevents consolidated billing when there are users within the project members who own billing authorizations.
To group projects into groups and consolidate group subprojects to see usage, remove billing authorizations from project members, and users with billing authorizations in the group will see their subprojects' billing data consolidated into one.
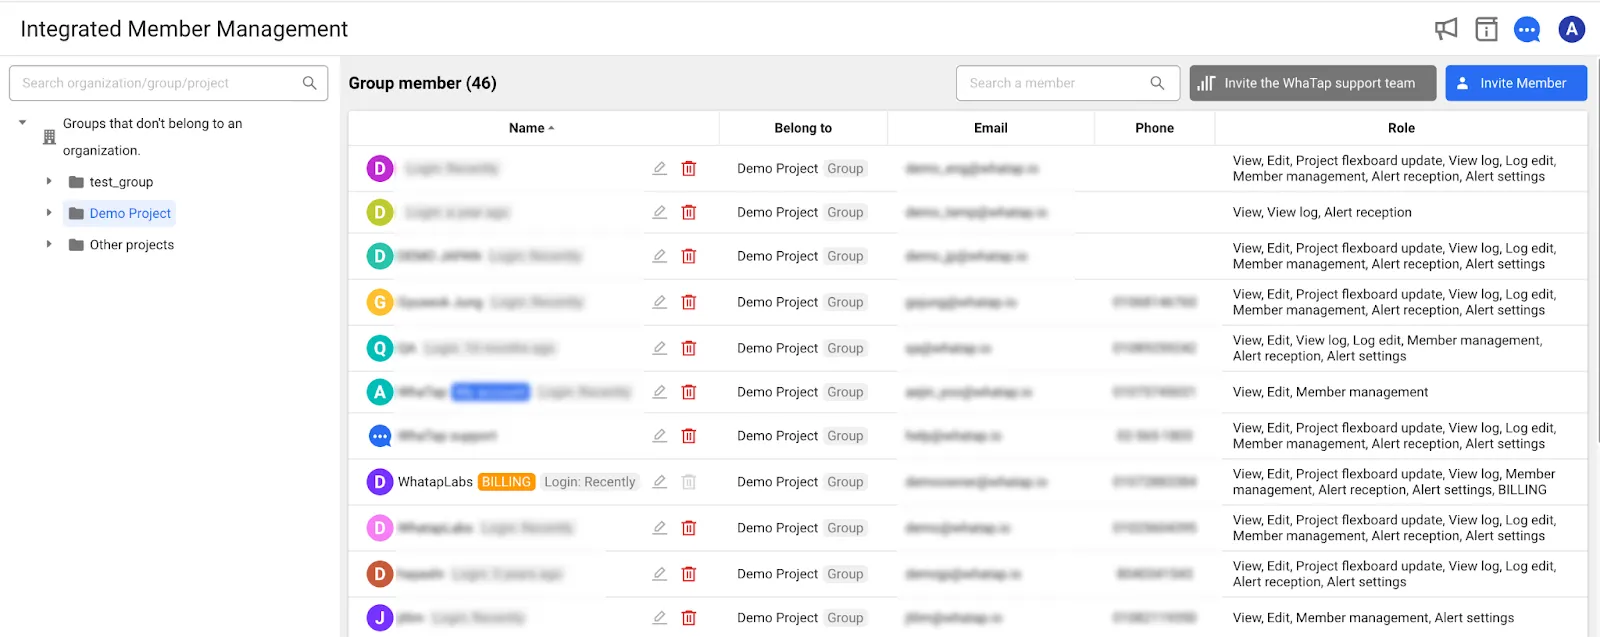
On the service screen, you can check the entire group and project configuration history and which members have which authorizations at a glance from the [Manage] → [Manage integrated members] menu, as shown below.
Sometimes, even if you are one company, you need to bill separately. In that case, you can create two groups and set different users with billing authorizations for each group, right?
If you have different people in charge of monitoring and accounting, you can still give the people in charge of monitoring everything but billing and the people in charge of accounting only billing.
In this installment, we have covered the most basic project management structure and changing account authorizations. In the next installment, we will discuss a more complex structure for MSPs.


